Get started with Canon Printer Setup – Easy driver installation at ij.start.canon
Download Canon printer drivers via ij.start.canon, read the online manuals, follow our step-by-step guide, and set up your printer easily.
Compatibility and Setup
Download Canon Printer Drivers via ij.start.canon for
Windows
MacOs
Linux
GET STARTED
Setup Canon Printer – Easy step-by-step guide using ij.start.canon
Setting up your Canon printer/scanner for the first time using ij.start.canon or ij.start.cannon. Follow easy & simple steps. Whether you have a new PIXMA, MAXIFY, or imageCLASS model, this step-by-step guide will help you get started in just a few minutes.
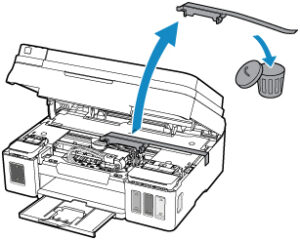
- Get Your Printer Ready and Unpack it:
- Remove the tapes and packaging materials from the printer after taking it out of the box.
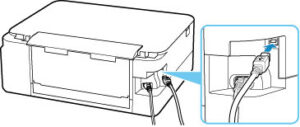
- Connect your Printer Scanner with a Power Supply:
- Now, connect the power cord that comes with your printer. The power cord or power cable port is located on the back of a printer.
- Now, press the Power button. Generally, Canon printers have their power button located on the front, but you might find it on the side in some models. Typically, you can spot it by looking for an “ON” label or a power symbol.
- Easy Wireless connect to a USB or Wi-Fi network:
- Hold down the printer’s Wi-Fi button until the light starts to flash.
- Download the Canon PRINT app on your phone, or the PC installer can also be used to connect for a USB connection.
- For USB Connection: Make sure you have your printer’s USB cable handy. When prompted by the installer to select a connection method, go ahead and choose USB, then plug in the cable.
- Go to ij.start.cannon or ij.start.canon:
- First, open any of your favorite web browsers, e.g, Safari, Chrome, Edge, or Firefox, and search for https://ij.start.canon or canon.com/ijsetup

- Next, enter your printer model number in the search box and hit Go.

- Finally, download the setup software that matches your computer, whether it’s Windows or macOS.

Printer Wireless Connection Setup
Easy Wireless Printer Setup
Easy Wireless Connect makes it simple to get your Canon printer or scanner online. In just a few quick steps, you can connect to your Wi-Fi network and start printing or scanning wirelessly from your computer or mobile device.
1. Begin Wireless Setup on Printer:
Tap and hold the Wi-Fi or Wireless Connect button until the light begins blinking. The printer will be in Easy Wireless Connect mode.
2. Install Canon App or Software:
On Windows/Mac: Download and install the Canon IJ Start Utility from
ij.start.canon or ij.start.cannon.
On iOS/Android: Install the Canon PRINT Inkjet/SELPHY app from the App Store or Google Play.
3. Connect to Wi-Fi:
Open the installed Canon software and follow the on-screen prompts.
Choose your Wi-Fi network and type in the Wi-Fi password when asked.
4. Setup Complete:
When connected, the Wi-Fi indicator light will remain constant.
You can now wirelessly print, scan, and control your printer from your device.
Canon Printer Not Working? Quick Fix
- Check Power & Cables – plug in the printer, turn it on, and connect all the cables.
- Put in Paper & Ink – Make sure you have paper in the tray and fully aligned cartridges.
- Check Wi-Fi or USB Connection – Make sure your printer uses the same Wi-Fi network as your computer, or try a different USB port.
- Restart Printer & Computer – This can fix small software or connection problems.
- Empty Print Queue – Go to Control Panel → Devices and Printers
Printer Wireless Connection Setup
Easy Wireless Printer Setup
Printer Wireless Connection Setup